Hardware overview (IFP105S)
Welcome to ViewBoard and your newly acquired interactive flat panel (IFP). Your ViewBoard IFP105S series comes with various components to assist in connecting devices and enhance your usage of the ViewBoard.
This article introduces the basics of the IFP105S's additional hardware, as well as gives an overview of the display's control panel and ports.
Equipment basics
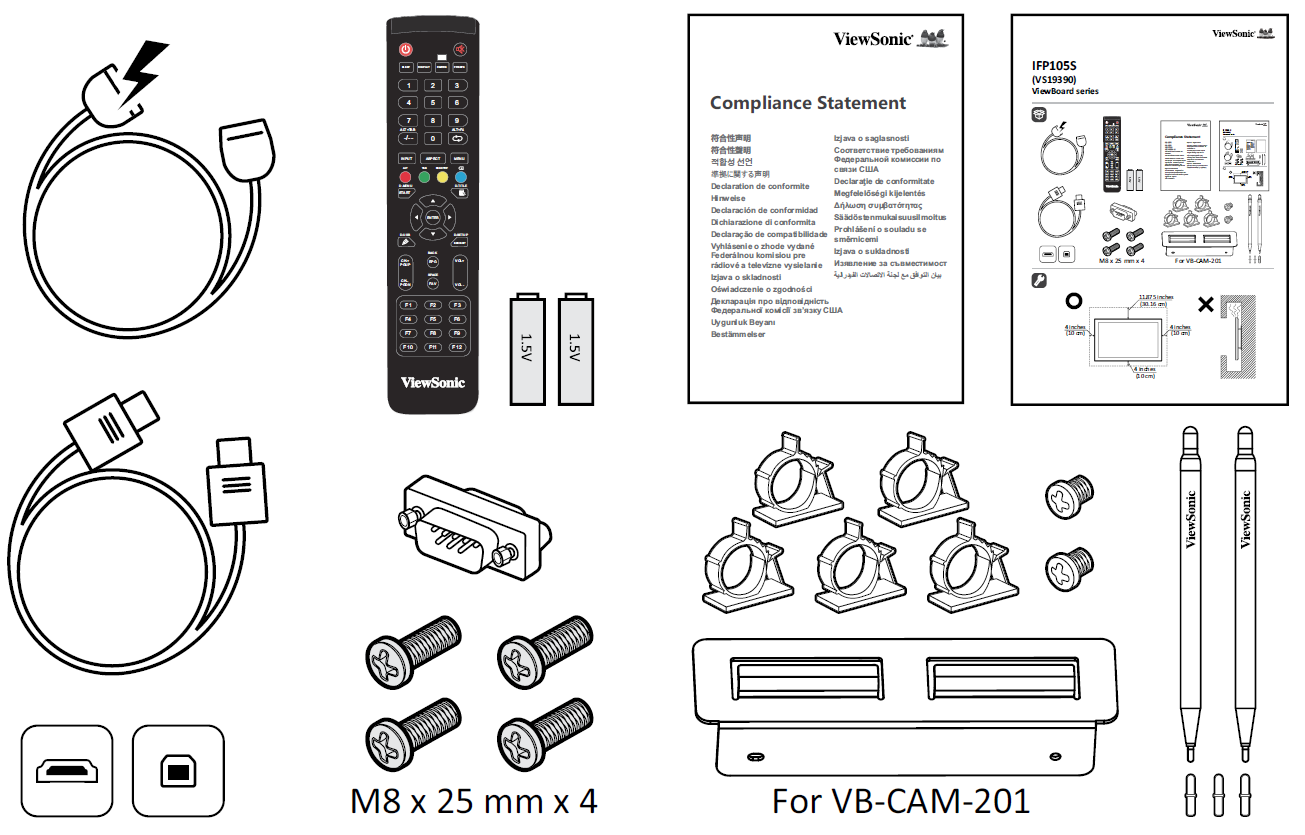
The following items are included in your IFP105S's packaging:
What comes with your ViewBoard
|
|
|
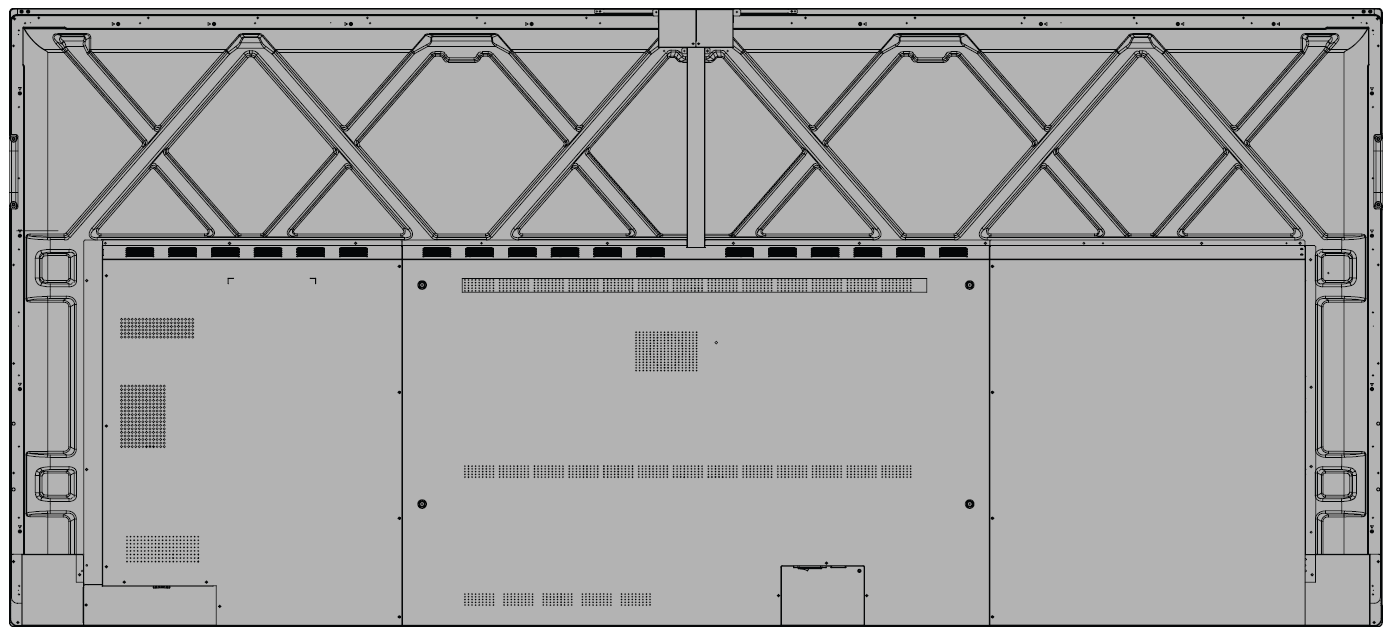
Wall mount kit specifications (VESA specs)
The following are some specifications for wall mounting an IFP105S. For specific wall mount or mobile mount bracket installation steps, please review your IFP105S's Quick Start Guide wall mount installation guide. If attaching to other building materials, please contact your nearest dealer.
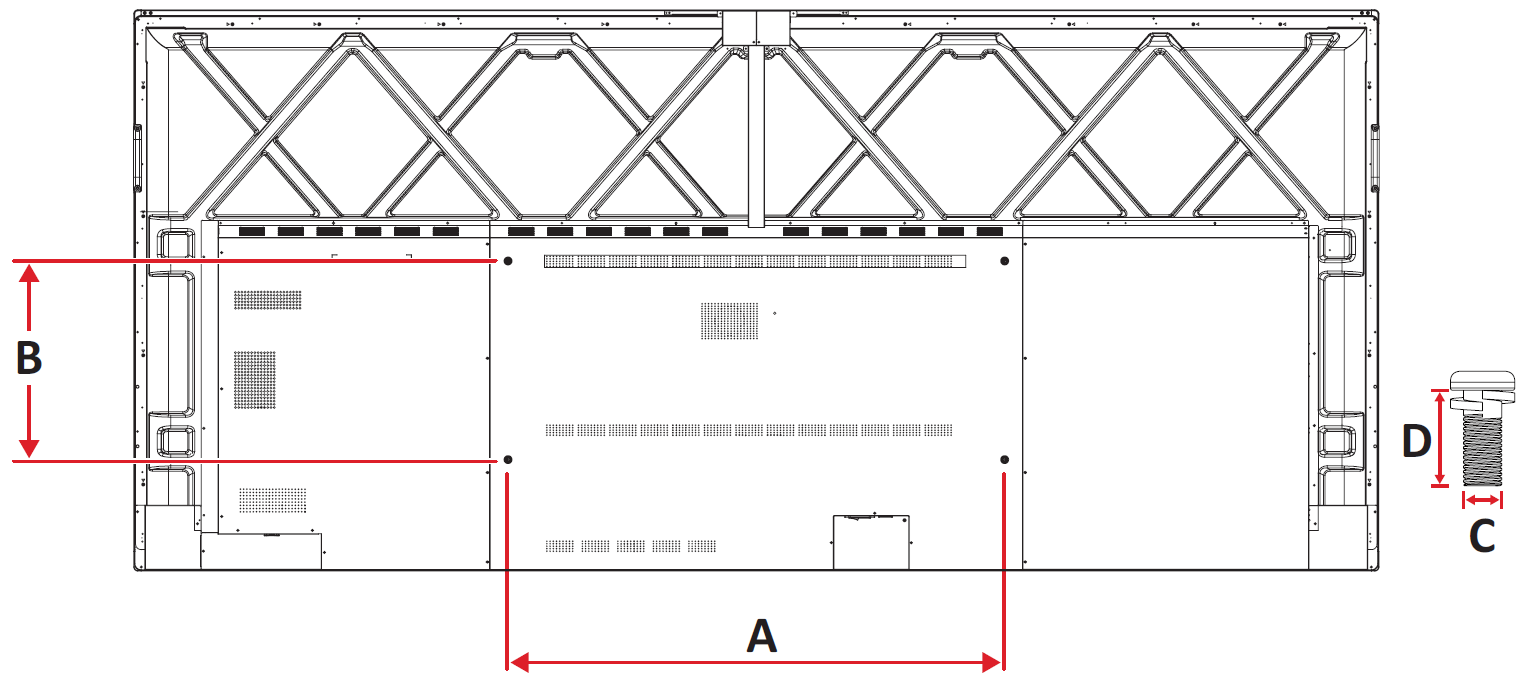 Rear panel with VESA spec measurements highlighted. Refer to the table below for corresponding measurements.
Model |
VESA Spec. |
Standard Screw |
Quantity |
|---|---|---|---|
| IFP105S | 1000 x 400 mm | M8 x 25 mm | 4 |
IFP33 controls and ports overview
This section breaks down the details of different input/out (I/O) ports and controls located on the IFP105S.
 Front panel of the IFP105S with input/output (I/O) ports and control panel areas highlighted.
 Rear panel.
Control panel
The control panel and front input/output (I/O), found on the bottom-right corner of the front of the IFP33, contain basic commands for the device and USB ports.
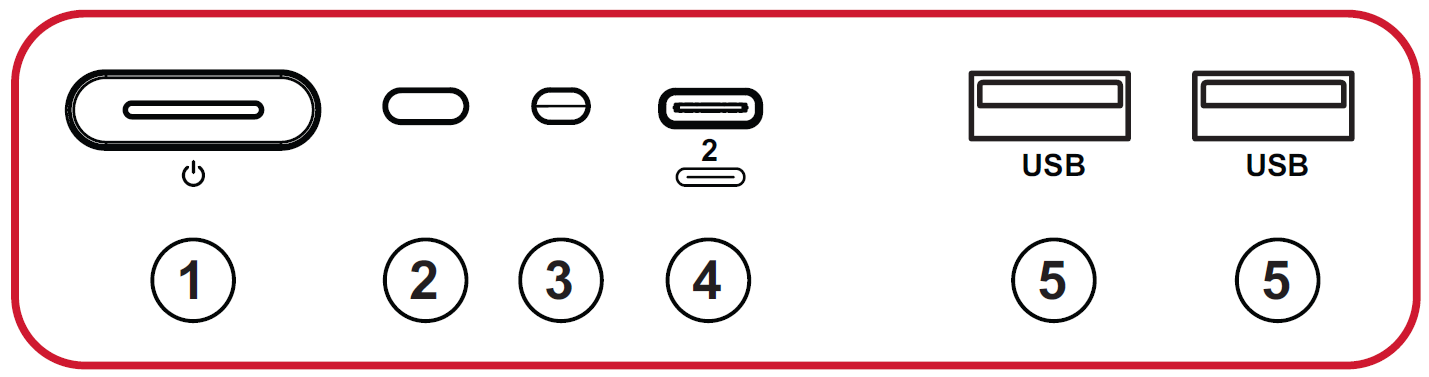 Refer to the table below for function details.
Button/Port |
Function |
|
|---|---|---|
| 1 | Power indicator |
|
| 2 | Remote control receiver | Receives commands from the device's remote control. |
| 3 | Ambient Light Sensor | Monitors a room's ambient light. |
| 4 | USB Type-C |
|
| 5 | USB 2.0 |
|
Input/output panels
Your IFP105S comes with multiple input/output (I/O) panels. The ports on these panels provide different ways to connect external devices by cable.
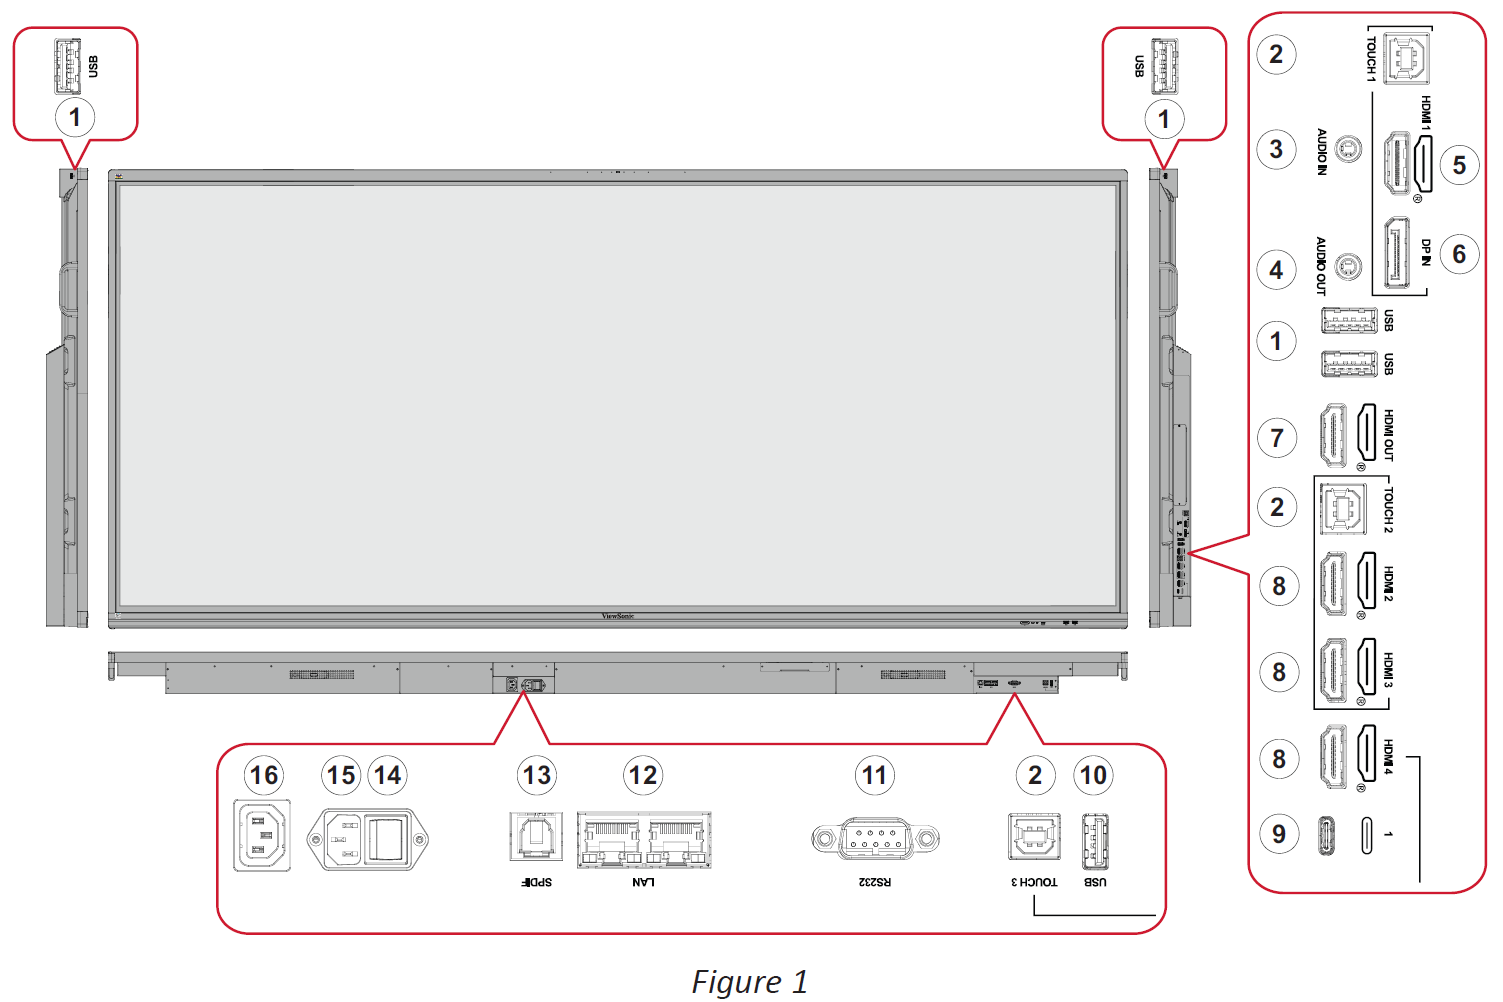 Overview of I/O panels located on different parts of the device.
Port |
Function |
|
|---|---|---|
| 1 | USB 3.0 |
|
| 2 | TOUCH 1/2/3 |
|
| 3 | AUDIO IN | External computer audio input. |
| 4 | AUDIO OUT | Audio to an external speaker or sound system. |
| 5 | HDMI 1 |
|
| 6 | DP IN |
|
| 7 | HDMI OUT | Connect to devices to display content from your IFP105S to it. |
| 8 | HDMI 2/3/4 |
|
| 9 | USB Type-C |
|
| 10 | USB 2.0 |
|
| 11 | RS-232 | Serial interface; used for mutual transfer of data between devices. |
| 12 | LAN |
|
| 13 | SPDIF | For transmitting digital audio signals. |
| 14 | Power switch | Turn AC power supply ON/OFF. |
| 15 | AC IN | AC power input. |
| 16 | AC IN | AC power output. |
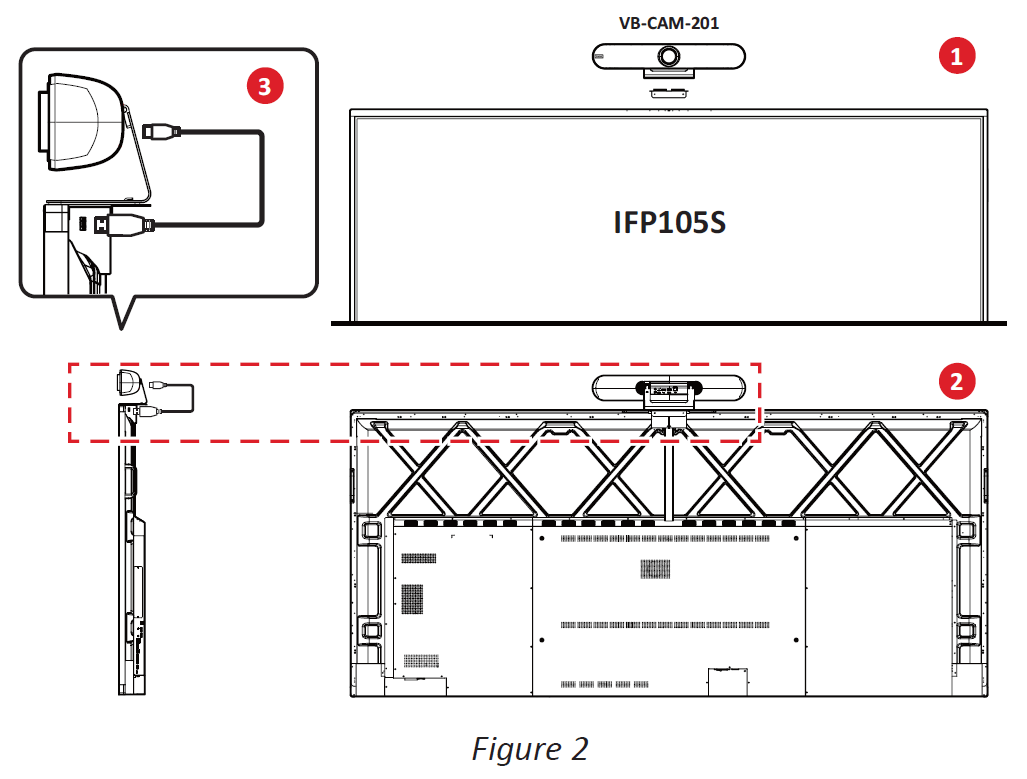
How to install the VB-CAM-201 onto the IFP105S
For the best viewing angle, we recommend installing the VB-CAM-201 onto the top of the IFP105S and connect it via the USB port located on the top backside of the IFP105S.